
Up & Running in
Under 30 Minutes.
Everything you need to mount, connect, configure, and activate your RADCam. No professional required.
Installation Overview
Welcome to the RADCam installation guide. Follow these simple steps to install and configure your RADCam and start protecting your home with intelligent, autonomous security.
-
Main Entrance Monitor visitors and delivery drivers at your front door
-
Side Entrances Cover secondary entry points that are often overlooked
-
Garage Doors Oversee vehicle access and monitor the driveway area
-
Rear Entrances Ensure coverage of less visible, higher-risk access points
What's Covered in This Guide
- Choosing the right installation location
- Step-by-step mounting and connection instructions
- Configuring the camera through the RADCam app
- Scheduling and setting the camera to different modes
- Ongoing maintenance and troubleshooting tips
Installation Instructions
Follow these detailed steps to install your RADCam securely and ensure optimal performance.
Choose the Installation Location
Select a spot that gives RADCam a clear, unobstructed view of the area you want monitored. The location should be within reach of a power outlet, or plan to use a weatherproof extension cable.
Avoid: Excessive direct sunlight, heavy rain exposure without overhang protection, or extreme shadows that may affect video quality and AI detection accuracy.
Prepare the Mounting Surface
Preparation varies depending on the surface material. Use the guide below to determine the right approach for your installation.
Use the included wood screws. Drill pilot holes to prevent splitting.
Use a masonry drill bit. Insert wall anchors or masonry screws (not included).
Consult a hardware store for compatible screws or anchors for your surface type.
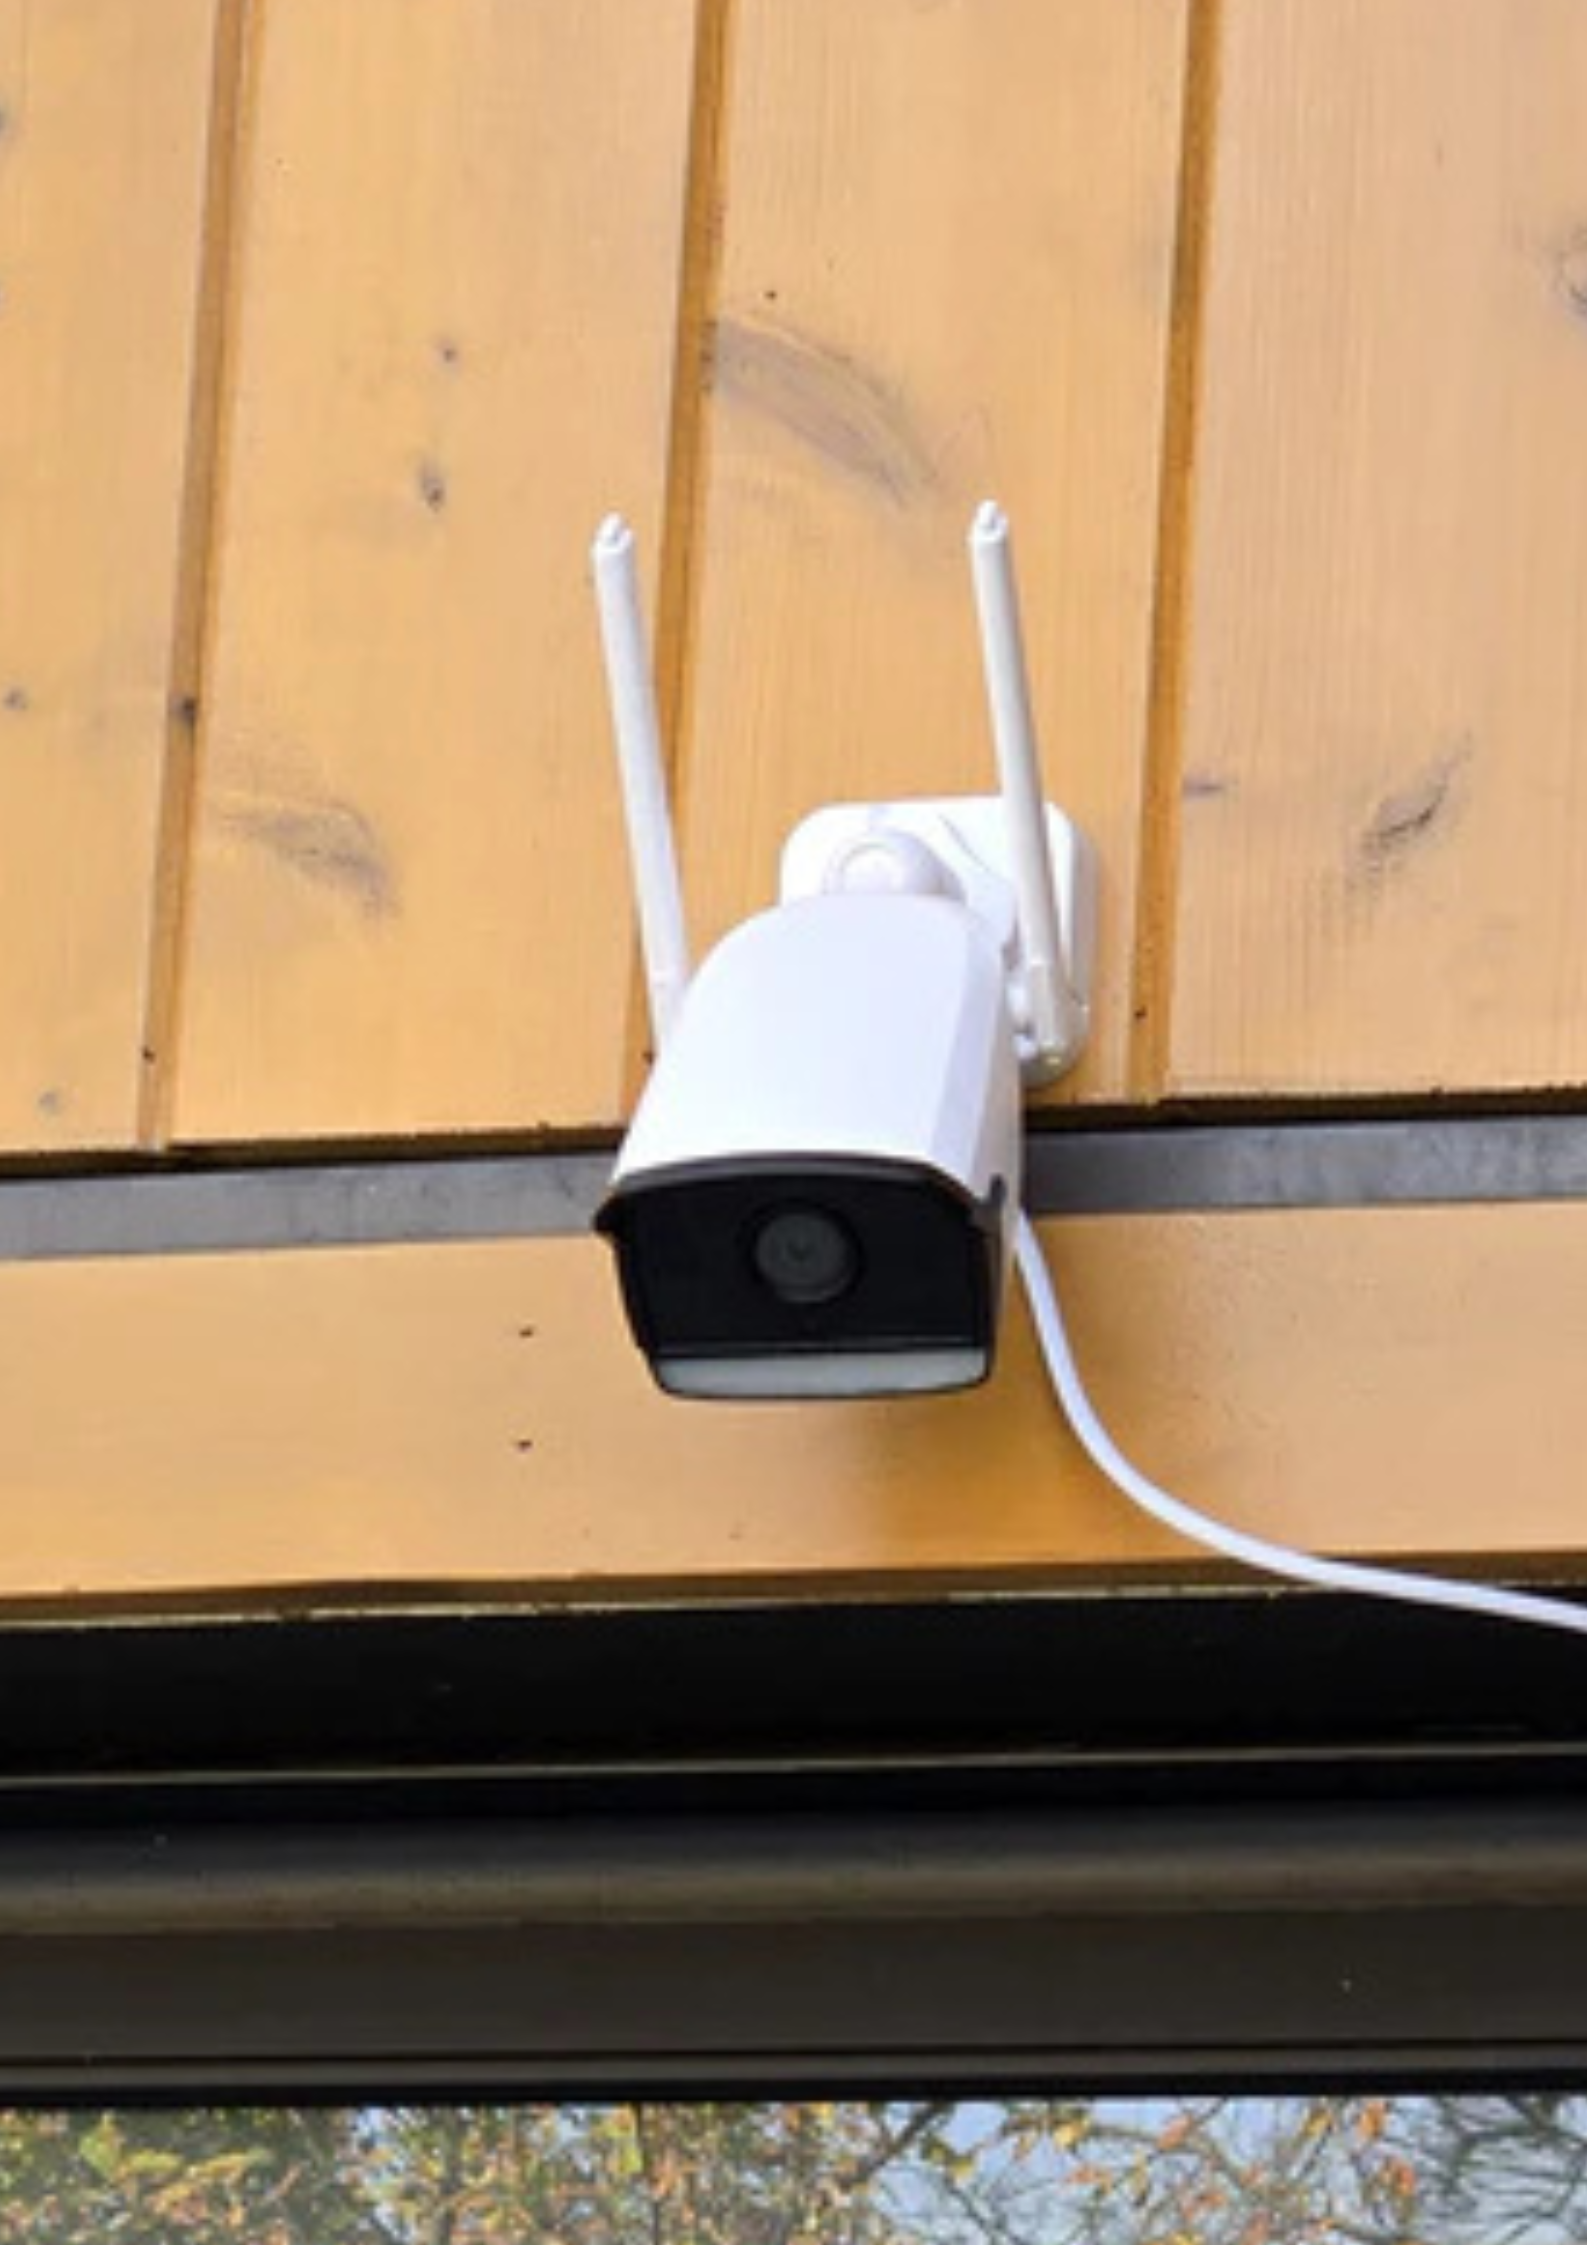
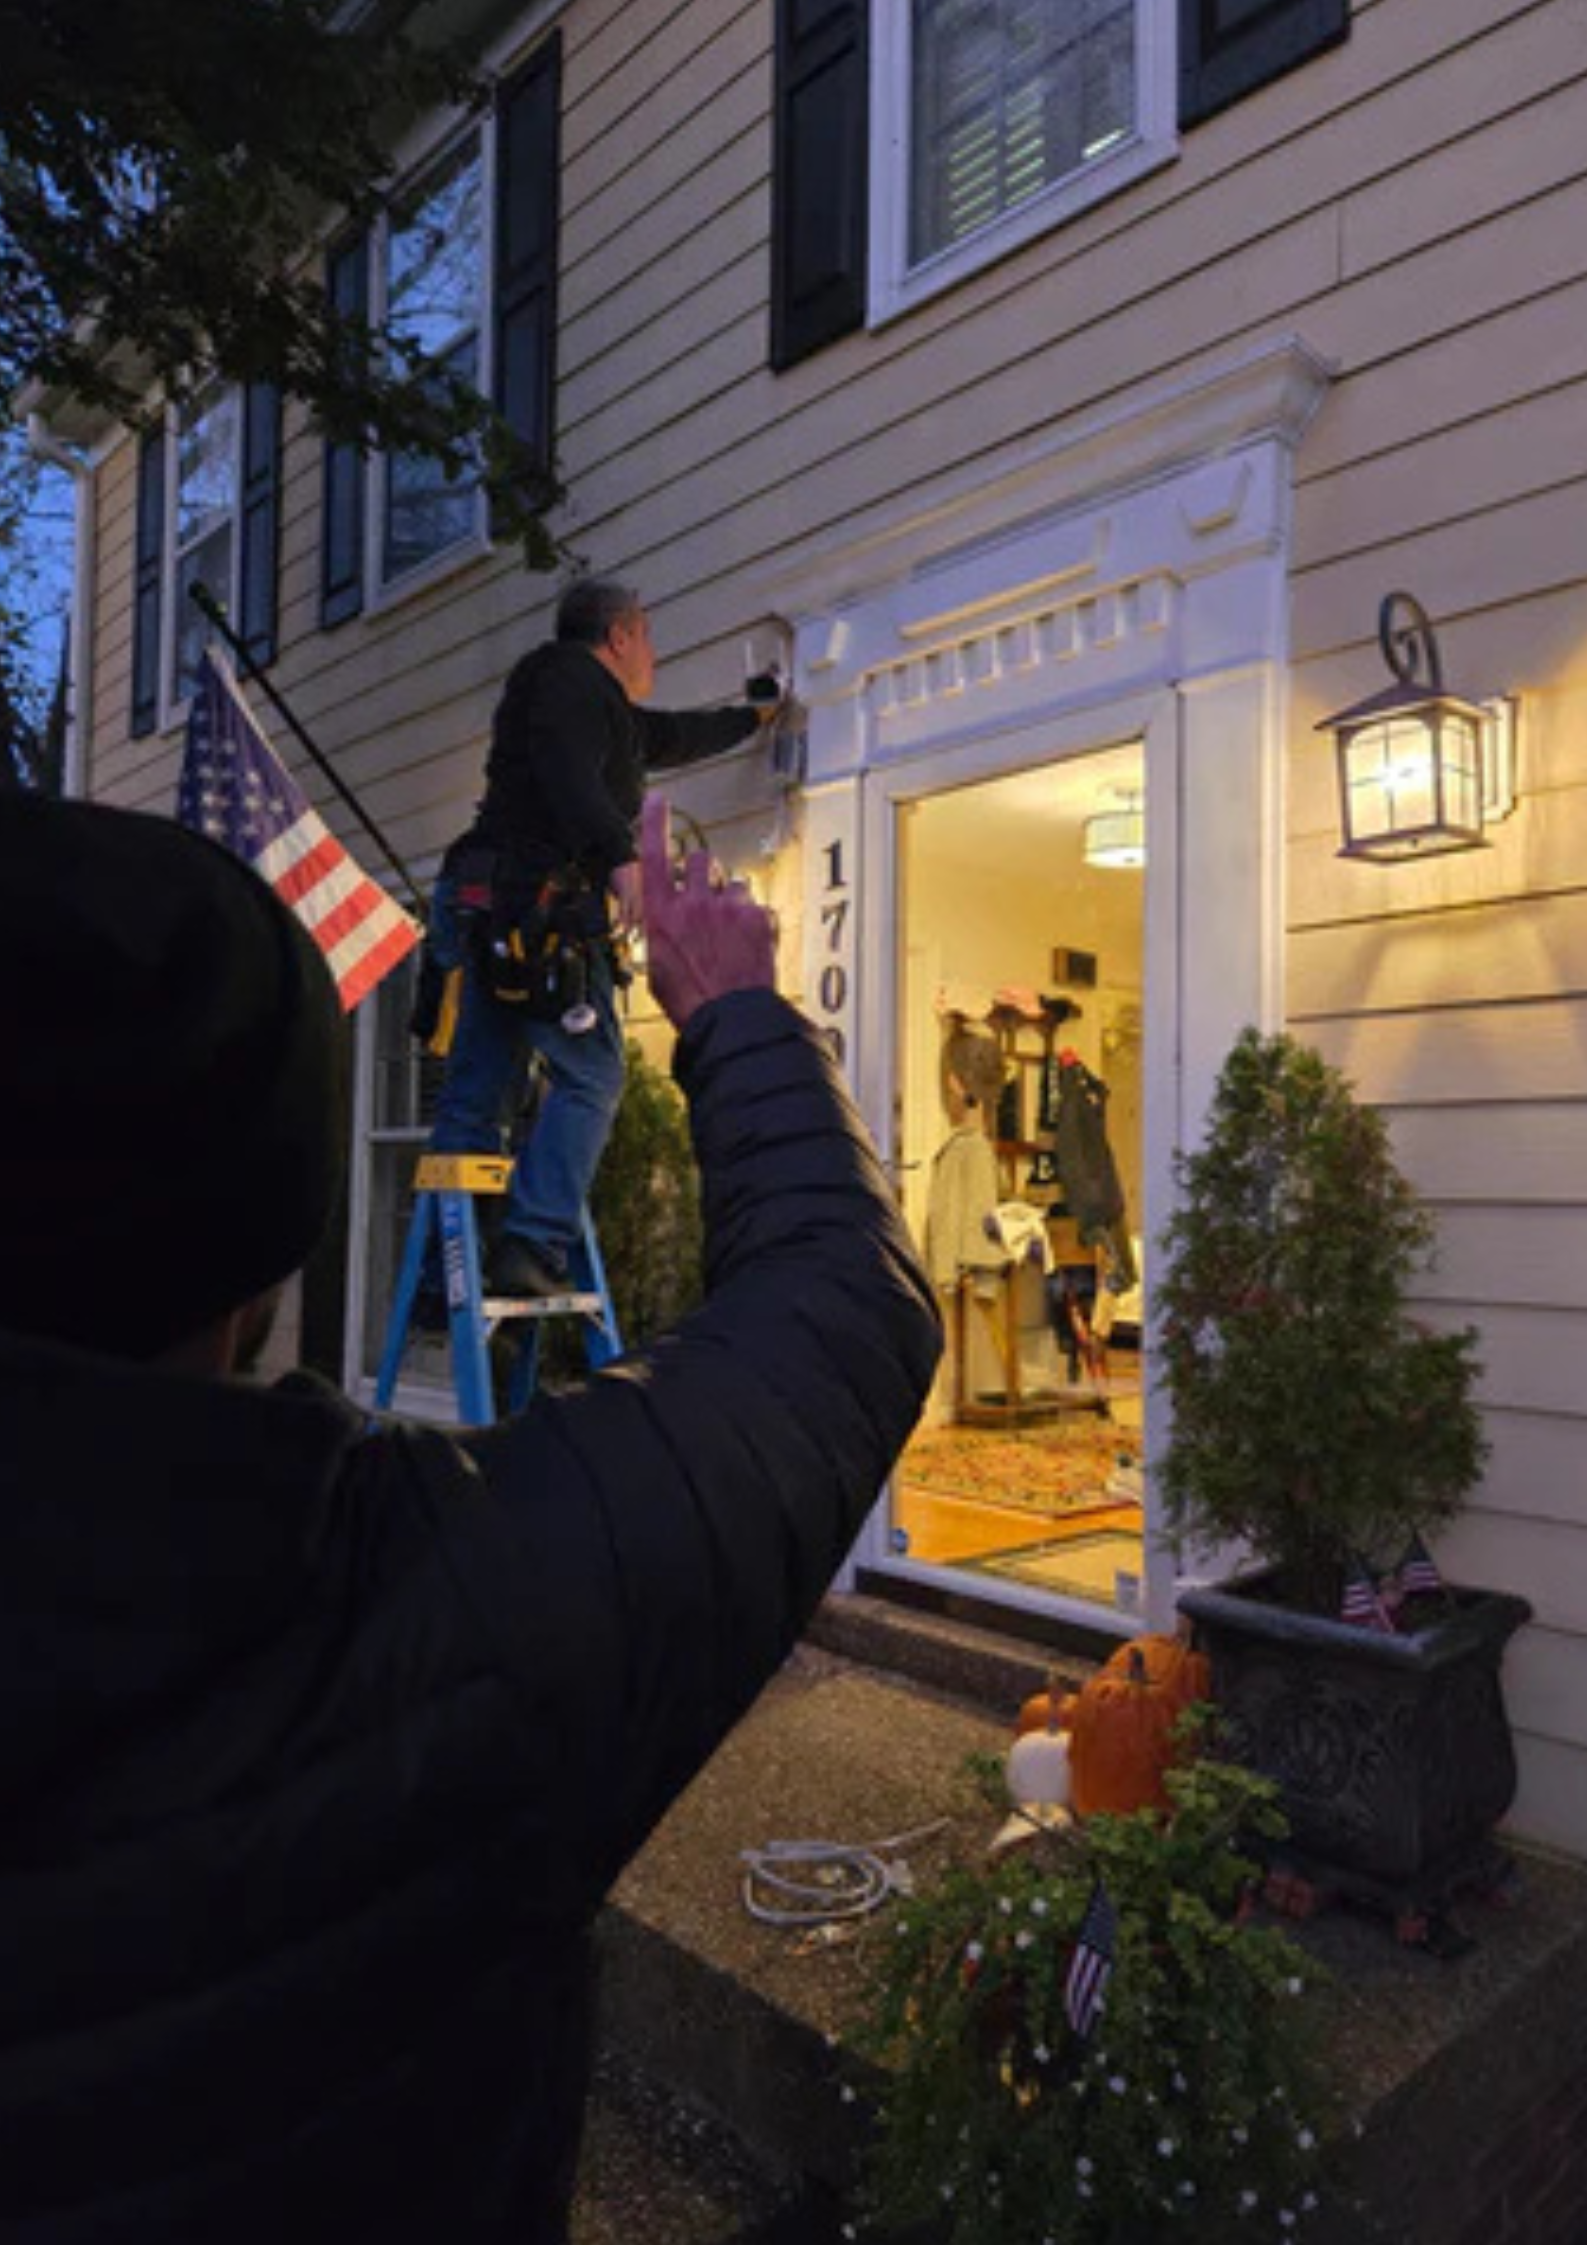
Mount the RADCam
-
1
Hold the mounting base of the RADCam flat against the wall surface at the desired location.
-
2
Use a pencil or marker to mark the screw hole positions on the surface.
-
3
Drill the necessary holes based on the surface type identified in Step 2.
-
4
Secure the RADCam to the wall using the appropriate screws. Ensure the mount is firm with no movement.
Connect to Power
-
1
Route the power cable from the RADCam to the nearest power outlet.
-
2
If the outlet is far away, use a weatherproof extension cable to bridge the distance safely.
-
3
Secure the cable along walls or eaves using cable clips to keep it tidy and protected from the elements.
Pro tip: Hide the cable run behind siding or gutters where possible for a cleaner look and added protection against tampering.
Adjust the Camera Angle
Use the adjustable bracket to position the camera and ensure it captures your desired field of view. Aim for the area where people are most likely to approach, such as a walkway, door threshold, or driveway.
Test with the app: Open the RADCam app and check the live view before fully tightening the mount bracket. This lets you fine-tune the angle without guesswork.
Configure via the RADCam App
-
1
Open the RADCam app on your smartphone. Available for iOS and Android.
-
2
Follow the in-app instructions to connect your RADCam to your home Wi-Fi network.
-
3
Allow any firmware updates to complete. This ensures your RADCam has the latest AI models and security patches.
-
4
Your subscription activates after setup is complete. You won't be charged until the camera is fully activated.
Pro tip: For a smooth setup, connect your RADCam to Wi-Fi within the first 10 minutes after powering it on. If you experience any connection issues, simply power the camera off and back on, then try again.
Modes & Scheduling
RADCam adapts to your security needs around the clock. Configure it to behave exactly how you want, at exactly the right times.
Security Mode
DeterrenceDesigned for off-hours or high-risk periods. RADCam immediately warns trespassers and escalates if they fail to comply.
- Immediately issues warning to trespassers
- Follow-up warning with identifying information
- Escalates to SOS if trespasser refuses to leave
- Sends security alert to your app instantly
Quiet Mode
Silent WatchRADCam stays silent but keeps watching. All human detections are logged without any audio engagement or active deterrence.
- No audio interaction with detected individuals
- All human detections are logged silently
- Useful during parties or busy household periods
- Full event history still accessible in app
Automate Your Security Posture
Create a custom 7-day schedule to define RADCam's behavior during different times of the day. Let it shift automatically between Security and Quiet modes so you never have to think about it.
Maintenance & Troubleshooting
Keep your RADCam in peak condition with these simple habits, and resolve common issues quickly.
Maintenance Tips
Regular, simple maintenance keeps your RADCam performing at its best regardless of weather or season.
-
Lens CleaningPeriodically wipe the camera lens with a clean, soft microfiber cloth to remove dust, moisture, and debris. Avoid abrasive materials that could scratch the lens.
-
Inspect ConnectionsAfter periods of extreme weather, check the power cable and all connections for wear, cracking, or corrosion. Replace weatherproof cable clips if damaged.
-
App & Firmware UpdatesKeep the RADCam app and device firmware up to date. Updates deliver improved AI accuracy, new features, and security patches.
Troubleshooting
If you run into any issues after installation, these common fixes resolve the majority of problems quickly.
-
No Power / Camera Won't Turn OnEnsure the power cable is securely connected at both ends. Check the outlet is live. Inspect the cable for damage and use a weatherproof extension cord if necessary.
-
Poor Video QualityMake sure the camera is not aimed directly into sunlight or extreme shadows. Clean the lens. Check that no obstructions (spiderwebs, condensation) are covering the lens housing.
-
Wi-Fi Connection IssuesFor a smooth setup, connect your RADCam to Wi-Fi within the first 10 minutes after powering it on. If you experience any connection issues, simply power the camera off and back on, then try again.
-
Need More Help?Visit radcam.ai for full support documentation, or email support@radcam.ai.
Ready to Get Protected?
RADCam ships ready to install. Everything you need is in the box. Your home will be actively defended before the day is over.
Shop RADCamQuestions Before You Buy?
From setup to subscription, our FAQ covers everything you need to know before and after you buy.
View FAQ